State Management
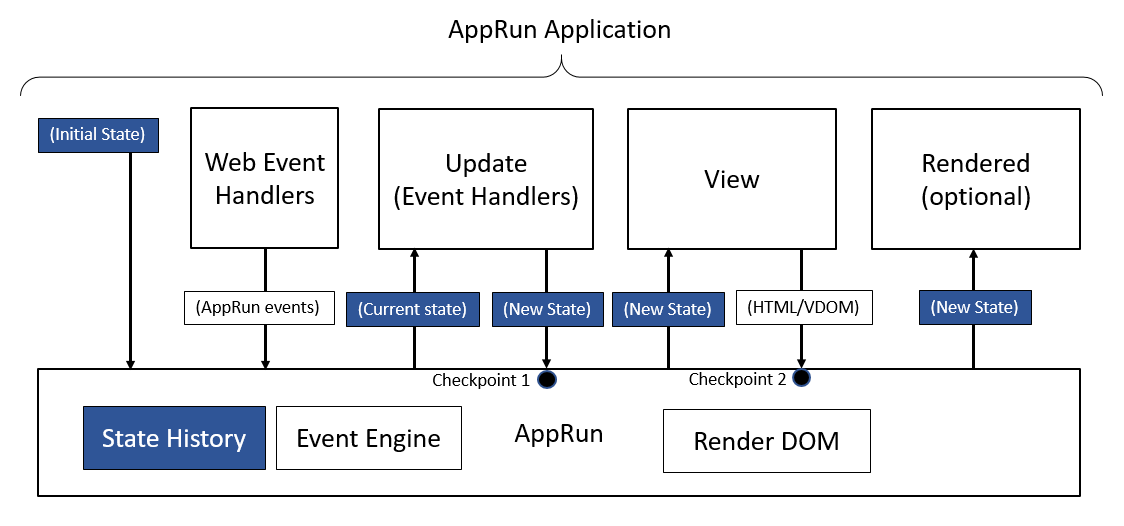
The State, one of three main parts of the AppRun architecture, plays an essential role in the AppRun event lifecycle. It is the equivalent of the Model of Elm architecture. Elm defines the Model as the application state. Model and State are two names of the same thing. Therefore, they are interchangeable in the AppRun architecture. Most of the time, we use the term State in AppRun.
The State is the application state at any given time of your application. The State is the data flow between Update and View. It acts as the data transfer object (DTO) in traditional multilayered application architecture, where the DTO is an object that carries data between logical and physical layers.
The benefit of using events and DTO like the state is that there are no dependencies between the view and update (event handlers). Thus, it makes the AppRun applications easier to develop, test, and maintain. You can get more information about unit testing later.
Initial State
We only need to define the initial state. The initial state is an immutable constant. AppRun manages the state through the event lifecycle.
Asynchronous State
We can define the initial state as a function. And even an asynchronous function to initialize the state.
// Init State as an Async Function
const state = async () => {
  const response = await fetch('https://xkcd-api.netlify.app');
  const comic = await response.json();
  return { comic };
};
const view = state => <>
  { state.comic && <img src={ state.comic.img } />}
</>;
app.start(document.body, state, view);
State History
The state can be stored in state history by AppRun. Once the state history is enabled, we can travel through the history back and forth to get the previous and next state. See the sample below.
const state = [];
const Counter = ({num, idx}) => (
<div>
<h1>{num}</h1>
<button $onclick={["-1", idx]}>-1</button>
<button $onclick={["+1", idx]}>+1</button>
<button $onclick={["remove-counter", idx]}>x</button>
</div>
);
const CounterList = ({counters}) => counters.map((num, idx) =>
<Counter num={num} idx={idx} />
);
const view = (state) => {
return (
<div>
<div>
<button $onclick="history-prev"> << </button>
<button $onclick="history-next"> >> </button>
<button $onclick="add-counter">add counter</button>
<button $onclick={["remove-counter", state.length-1]}
disabled={state.length <= 0}>remove counter</button>
</div>
<br/>
<CounterList counters={state} />
</div>);
};
const update = {
'add-counter': (state) => [...state, 0],
'remove-counter': (state, idx) => [
...state.slice(0, idx),
...state.slice(idx + 1)
],
'+1': (state, idx) => [
...state.slice(0, idx),
state[idx] + 1,
...state.slice(idx + 1)
],
'-1': (state, idx) => [
...state.slice(0, idx),
state[idx] - 1,
...state.slice(idx + 1)
]
};
app.start(document.body, state, view, update, {history: true});
Although it is effortless to enable the AppRun state history, the caveat must be immutable. Because the AppRun state history stores the references to the states, if we have modified the state directly, each state stored in the state history refers to the same state, which is always the value of the last change. Thus, the time travel back and forward will not work. Therefore, the fundamental concept of using state history is to make the state immutable.